
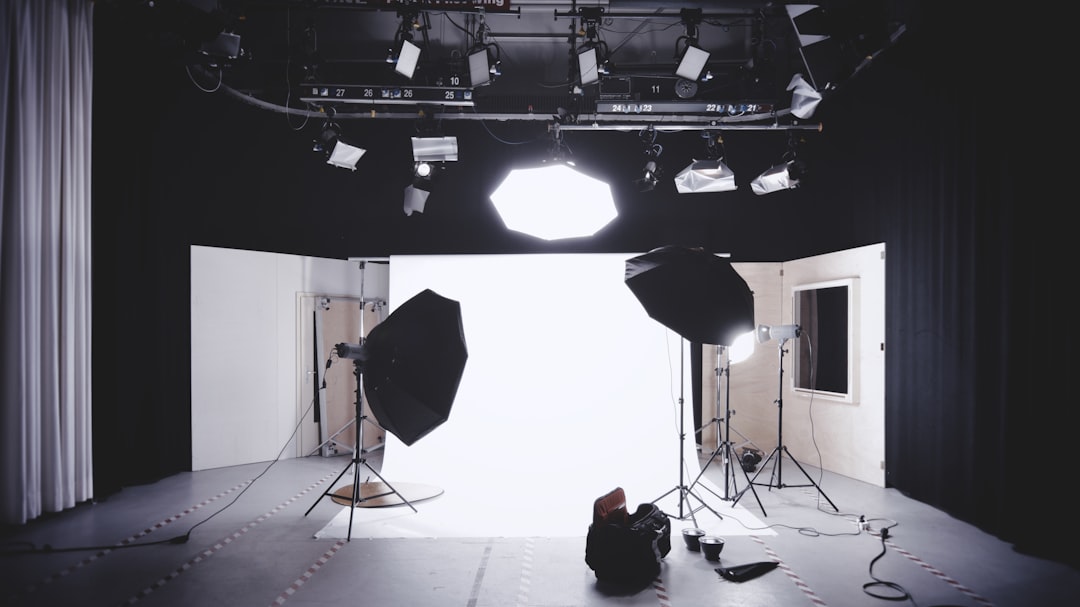
For a compliant Schengen visa photo, use soft, diffuse, even lighting that illuminates the entire face without shadows, glare, hotspots, or color shifts. ICAO biometric-image principles favor clear facial detail, visible eyes, natural skin tones, and consistent exposure. Place the applicant facing the camera against a plain light background, then inspect the image at full size. Red flag: fix any shadow or reflection before submission.
Lighting rules for Schengen visa photos are simple in principle: the face must be evenly illuminated, clearly visible, and free from shadows, glare, and distracting hotspots. The most reliable setup uses soft, diffused light placed near the camera, a plain light background, and a straight-facing pose. Exposure must show natural facial detail without making the skin too dark, too pale, or color-shifted. Lighting is only one part of the complete visa-photo standard, so confirm the responsible consulate’s current instructions for size, background, cropping, and submission format before you print or upload the image.
This is not portrait photography. A dramatic side light may look professional in a studio portfolio; on a biometric image, it merely gives the software less face to read. The camera does not negotiate.
Why Schengen Visa Photo Lighting Matters
Lighting matters because a Schengen visa photograph is used as an identity image, not as a flattering portrait. Facial features must remain distinguishable across the full image: the eyes, nose, mouth, cheek contours, and the natural outline of the face should not disappear into shadow. A photograph can have the correct dimensions and background yet still fail because the lighting changes the apparent shape of the face.
ICAO Doc 9303 biometric-image principles emphasize a clear, recognizable facial image with consistent exposure and sufficient detail. Those principles do not replace the specific instructions issued by the responsible Schengen consulate, visa center, or member-state authority. They explain why recurring requirements exist. “No shadows” is not decorative language; shadows can conceal facial landmarks and interfere with automated comparison.
Distinguish between a binding instruction and a studio recommendation. If the application authority states that the background must be uniformly light, that is an application requirement. If a photographer recommends two softboxes at a particular angle, that is a practical method for meeting the requirement. The equipment is not prescribed. The result is what is examined.
For applicants comparing country guidance, Spain visa photo requirements can provide useful related context, but do not transfer one country’s exact dimensions or upload rules to another application without checking the relevant authority. Schengen practice is coordinated in broad terms, while document instructions and submission procedures can differ.
Core Lighting Concepts for a Biometric Photo
What even lighting means
Even lighting means the left and right sides of the face are illuminated at broadly similar levels. The forehead, cheeks, nose, and chin should show natural detail without one side becoming visibly darker. The background should also be free from a dark halo around the head. A small, soft tonal transition on the face may be unavoidable, but a hard-edged stripe or deep patch is a warning sign.
For an even lighting passport photo, use a large diffused light source close to the camera or two matching sources on both sides of it. Place them slightly above eye level and angle them gently toward the face. This reduces the nose shadow and helps prevent a dark eye socket. Keep the applicant away from the wall—approximately three to five feet is a useful studio starting point—so the head does not cast a strong shadow onto the background.
Color and exposure
Use neutral white lighting and inspect the result for a natural skin tone. Mixed light from a blue window and a warm household bulb can create an uneven color cast across the face. Automatic camera processing can also brighten the background while underexposing the subject. Adjust the light and exposure rather than relying on aggressive editing.
In practical terms, the image should not have blown-out forehead highlights, a black area under the chin, or a yellow-and-blue split across the face. If facial detail disappears when the image is viewed at its actual submission size, the lighting is not adequate. For a broader preparation checklist, the guide to a perfect biometric shot is relevant, particularly on positioning and image quality.
Step-by-Step Guide to Even Biometric Photo Lighting
Step 1: Prepare the space
Choose a plain, light-colored background and remove nearby objects that may reflect light. A white wall can work, but it should be clean and matte rather than glossy. Keep the applicant several feet forward from the wall. This separation prevents a head shadow and makes it easier to produce an even background.
Step 2: Position the lights
Place the main light close to the camera axis, slightly above the applicant’s eye level. A second matching light on the opposite side can balance the face. If you use a window, diffuse the daylight with a sheer curtain and avoid direct sun. Direct sunlight produces hard shadows, squinting, and uneven exposure. A bare flash mounted directly on a camera is also unreliable: it may flatten the face while creating a bright reflection on glasses or oily skin.
Step 3: Position the applicant
The applicant should face the camera directly with the head centered and level. Do not turn the face to “find the good side.” That is a portrait instinct, and it is not useful here. Keep hair away from the eyes and eyebrows where it blocks facial detail. A head covering worn for religious or medical reasons may be permitted under applicable guidance, but the full face must remain visible and the covering must not cast a shadow.
Step 4: Inspect before printing
Review the unfiltered image at full size. Check both eyes, the bridge and sides of the nose, the area beneath the chin, and the background immediately around the head. Confirm that no lamp, window, or phone flash has produced a bright spot. Examine the printed photograph too, because some printers deepen shadows and alter color. If the software cannot read your face clearly, the officer will not rescue the image.
For additional comparison, the article on general passport photo requirements can help you separate lighting, framing, and facial-positioning checks. It remains necessary to apply the exact instructions for your Schengen application.
Common Lighting Mistakes That Cause Rejection
Shadow across the face
The most common error is a hard shadow from one side light, an overhead lamp, hair, or the applicant’s nose. A shadow under the chin is particularly easy to miss when the photographer watches only the eyes. Move the light closer to the camera, increase diffusion, or raise the ambient fill. Do not attempt to paint the shadow away afterward; editing may create unnatural skin detail and can undermine image integrity.
Shadow on the background
A dark outline behind the head often appears when the applicant stands directly against the wall and the light comes from above or from one side. Move the applicant forward and illuminate the background separately if necessary. The background should appear plain and consistent, not like a spotlight on a theater stage.
Glare, reflections, and hotspots
Glasses can reflect a window, softbox, or flash and cover one or both eyes. Tilt the light slightly, raise it, or reposition the camera while keeping the head straight. If the applicable guidance allows glasses to be removed, doing so is usually the simpler solution. Avoid tinted lenses. A shiny forehead or nose can also produce a small white hotspot that removes facial texture; use softer light and reduce excessive exposure.
Uneven color and underexposure
Mixed lighting can make one side of the face blue and the other yellow. A dim image may preserve the outline of the head but lose detail around the eyes and mouth. Increase the available light rather than applying a strong brightness filter. Filters can smooth skin, alter color, sharpen edges, or change the apparent facial structure.
Red flag: fix it before you submit. Retake the image if you see a visible facial shadow, background shadow, eye reflection, blocked eyebrows, unnatural color, or a face that is too dark or washed out. Rejection is avoidable when the defect is obvious before submission. The camera does not negotiate, and neither does a technically weak image.
Final Checklist Before You Submit
Lighting is not the only Schengen photo rule
A correctly lit image can still be unusable if the dimensions, crop, background, facial expression, or submission format is wrong. The applicant normally needs a neutral expression, a closed mouth, direct eye contact, and a straight head position. Smiling broadly or showing teeth can alter the normal appearance of the mouth and cheeks. Hair should not cover the eyes or eyebrows. These are separate checks, but lighting must support them: a shadow over the eyes can create the same practical problem as hair.
Glasses, religious head coverings, medical devices, and photographs of children may receive specific treatment under the responsible authority’s guidance. Do not rely on a generic “passport photo” setting from a retail kiosk. Passport, national identity, and Schengen visa images may use different dimensions or delivery methods, even when their biometric principles overlap.
A final quality-control checklist
- Both eyes are fully visible, sharp, and free from reflections.
- The entire face has balanced exposure, with no hard side shadow.
- There is no shadow or halo on the plain background.
- Skin color appears natural, without mixed blue, green, or yellow lighting.
- The forehead, cheeks, nose, mouth, and chin retain visible detail.
- Hair, glasses, or a head covering do not obstruct required facial areas.
- No beauty filter, portrait blur, artificial background, or facial retouching has been applied.
- The final crop, dimensions, paper quality, and digital file specifications match the current application instructions.
Keep the original image and compare the printed copy with the digital file. Printing can introduce darker shadows, color shifts, or low contrast. If a studio produced the photograph, ask the operator to show you the image at full size rather than approving only a small preview. A careful two-minute inspection is cheaper than submitting a photograph that fails for a lighting defect.
When requirements conflict or are unclear, follow the current instructions of the consulate or authorized visa application center handling your case. General biometric guidance explains the technical reason; the application authority decides what it will accept.
Frequently Asked Questions
What is the best lighting for a Schengen visa photo?
Use two soft light sources placed slightly above and to either side of the camera, or one large diffused source positioned directly in front of the applicant. The goal is balanced illumination across both sides of the face. Avoid a single bare bulb, direct flash, strong window light, or overhead lighting. Check the background as well: it should remain light, plain, and free from visible gradients or shadows.
Are shadows allowed in Schengen visa photos?
Some shadows are often tolerated in ordinary photography, but biometric visa photos are assessed for facial clarity and consistent image quality. A dark shadow beneath the chin, beside the nose, or across the background can reduce usable facial detail and create a rejection risk. If the shadow is visible at normal viewing size, retake the image with larger, softer, more frontal light.
How do I prevent glare in a biometric visa photo?
Glasses are subject to the relevant mission and document guidance, but lighting must never create reflections that obscure the eyes. Remove glasses where permitted and practical, or adjust the lights and camera angle so both eyes remain fully visible. Tinted lenses, heavy frames, glare, and reflections are common failure points. The camera does not negotiate; visible eyes matter more than preserving an accessory.
Can I take a Schengen visa photo with my phone?
A phone can produce a usable image if it has adequate resolution, controlled lighting, correct framing, and no processing that changes facial appearance. Use the rear camera when possible, keep the lens clean, and avoid portrait mode, beauty filters, HDR artifacts, and automatic background replacement. However, a professional studio remains safer when the photo will be printed, cropped, or checked against strict mission instructions.